Showing posts with label Valentine cards. Show all posts

Saturday, January 3, 2026

Saturday Sketches


I am in a Stampin' Up! demonstrator group - and each week we are given a sketch challenge.  For the past year I have tried to make a card using the weekly sketch to post on my blog.  There were a few times during the year that I got behind - and then I got WAY behind during the holidays.  So today I am playing "catch up" and sharing several cards  that I made using sketches - most with products from the new Jan/April 2026 mini catalog.


The five cards below are made using a new pack of 6x6 designer series paper called LOVE NOTES, which is featured in the Stampin' Up! January-April 2026 mini catalog.


The  6th card shown in the photo above - is a New Year's card, which I posted about earlier this week.  You can see that blog post HERE.


When this paper becomes available - you will be able to take advantage of bonus days!  Spend $50 and earn a $5 coupon to spend in February - and you will also earn Stampin' Rewards!  WIN! WIN!


Once this paper becomes availabe, I will post informations about a product share - where you can get a half pack of the DSP and some coordinating card stock - to make these projects.  If you purchase this share - or purchase the  paper from me - I will send you a PDF with measurements for these cards.


Please contact me if you have any questions!


Shop my online store here:

https://kathywinter.stampinup.net/

Follow me on Face Book:

https://www.facebook.com/ladystampalot

Join my Facebook Group:

https://www.facebook.com/groups/907793999735887

Follow me on Pinterest:

https://www.pinterest.com/karwinter/

Follow me on You Tube:

https://www.youtube.com/@ladystampalot1

Thanks for stopping by!

Kathy


Wednesday, February 5, 2025

Her & Me


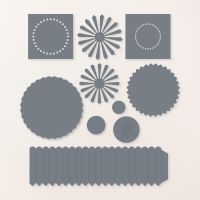
Each month I teach a "kids" class at a local community center.  The class is called "Her & Me" because each child has his/her mother, grandmother, or other adult there to help with the project.  These are the projects we made at Monday night's class - and they were a big hit!  Each child made three rosettes - I did quite a bit of the prep work by cutting out the pieces using the "Round We Go" dies - but they did the accordian folds and glued various hearts together for the centers. We hot glued the rosettes to skewers - and then poked them into a piece of pool noodle inside the tin bucket, hidden by a layer of tissue paper. Finished the whole thing off with some ribbon and a few small heart picks from the Dollar Tree.  Super cute!

I never know how long it will take for everyone to finish making the project - so I also prepared two Valentine's Day cards for them to make as well.  The girls loved using the Stampin' Cut and Emboss Machine to add texture to one of the card fronts.  They did a great job with stamping - especially since they were using red ink!

Below is a closer look at my sample projects - and I notice that one of my rosettes is backwards!  It really doesn't matter since we used double sided paper - the back is just as pretty as the front.  I only glued a circle to the back (instead of hearts.)


Below are three of the projects made at Monday's night class, and the three girls (& me!) who made them.  The girls were so excited about giving these masterpieces to their teachers the following day - for them to put on their desks and enjoy all month long.

I have some great photos of all the class participants - with everyone wearing a HUGE SMILE - but since I did not get permission from everyone to post - I will not share those photos here.

These classes fill up quickly - even though they have NO IDEA what project we will be making each month.  I usually don't even know - until the week before!  (Talk about procrastination!)  I always have a few ideas - but I can never seem to narrow it down until the last minute!

I used a lot of retied products and some past Paper Pumpkin kits for these projects - but below are two of the current items we used to make these projects. 

Please contact me if you have any questions!


Thanks for stopping by!

Kathy


Tuesday, January 23, 2024

Will You BEE Mine?


The very first stamp set I purchased from the Jan/Apr 2024 mini catalog was Bee My Valentine.  I usually don't like "bugs" on my cards - but this bee is sooooo cute that I couldn't resist.  I made these cards using the stamp set, along with the coordinating Bee Builder Punch and Bee Mine Designer Series Paper.  


These Square Pillow Boxes are part of the Bee Mine Suite Collection of products.  They come flat, but score marks help you shape these - and the adhesive is already on them - so it makes assembling the boxes quick and easy!  The boxes are white, but for the yellow one I used a blending brush to add color.  The one on the right was wrapped with some of the designer paper - and I left the top open to make it more of a treat bag.  So many possiblities for these boxes - and they are a good size!


Here is a little treat box that I made using card stock and Designer Paper.  I saw this idea on Pinterest and had to give it a try.  It will fit 4 mini Reeses peanut butter cups and makes a cute sweet treat.

Order these products soon if you want to make some sweet Valentines!   Or add this bundle of products to your wish list.  This cute set can be used throughout the year to show your love to someone special!  

Here are some of the products that I used to make these projects.  Click on any item for more information and to add it to your shopping cart!


Kathy
EMAIL ME with any questions:


Thursday, January 6, 2022

Sweet Talk Suite Collection


I can not believe it - but Valentine's Day is just a little over 5 weeks away!  Remember: Valentines are not just for kids or significant others.  I'm sure you have lots of people that you love and will want to let them know that on this special day.

The "Sweet Conversation" stamp set was the first one I had to buy from the new Jan/June 2022 mini catalog from Stampin' Up!  It has a set of coordinating dies and super cute Designer Series Paper.  In the video I show you 9 cards and a decorated box that I made using these and other products.  I point out a few details on each of the cards.  The basic directions for making some of these cards are listed below, and I will have more for you next week.  (If you are viewing this in your email or on a mobile device  - you may need to click on the title to load the video.)

Here are the cards that I feature in the video above.


Card 1 - This card is very similar to the one on page 8 of the Jan/June mini catalog - except I stamped the heart images instead of die cutting the hearts from the Designer Paper.

Basic Directions:
  • Blushing Bride card base: 5-1/2 x 8-1/2; embossed using Gingham Embossing Folder
  • Highland Heather Designer Paper: 2 x 3-3/4
  • Basic White strip for greeting: 1/2  x  2-3/4; cut right edge on angle
  • Ink colors for hearts: Highland Heather, So Saffron, Blushing Bride, Pool Party; stamped on Basic White and die cut
  • Add word details using Memento ink
  • Add Iridescent Rhinestone Jewels


Card 2 
Basic Directions:
  • Highland Heather card base: 5-1/2 x 8-1/2; stamped with Highland Heather ink using large dotted image
  • Basice White Layer, die cut using Stitched So Sweetly die
  • Greeting stamped using Highland Heather ink
  • Hearts die cut from Sweet Talk Designer Paper using Sweet Heart dies;attached to white piece using Stampin' Dimensionals


Card 3
Directions
  • Thick Basic White card base: 5-1/2 x 8-1/2
  • Striped Designer Paper: 3 x 3-3/4; layered on Real Red card stock: 3-1/4 x 4
  • Wrap 3/8 Real Red Faux Linen ribbon around the top of the DSP/card stock piece
  • Stamp X & O in a random pattern on a 2 x 4 piece of Blushing Bride card stock, then attach Real Red die cut hearts; stamp greeting with Real Red ink
  • Attach the two pieces above to the card front and add Irridescent Rhinestone Jewels

Below are some of the products I uesed to make the three cards above.  Click on any image for more details or to add it to your wish list or shopping cart.

Next week I will share more directions for making the other cards - so be sure to check back to see them!

In the meanitime, if you have any questions, please CONTACT ME.

Thanks for stopping by!
Kathy